
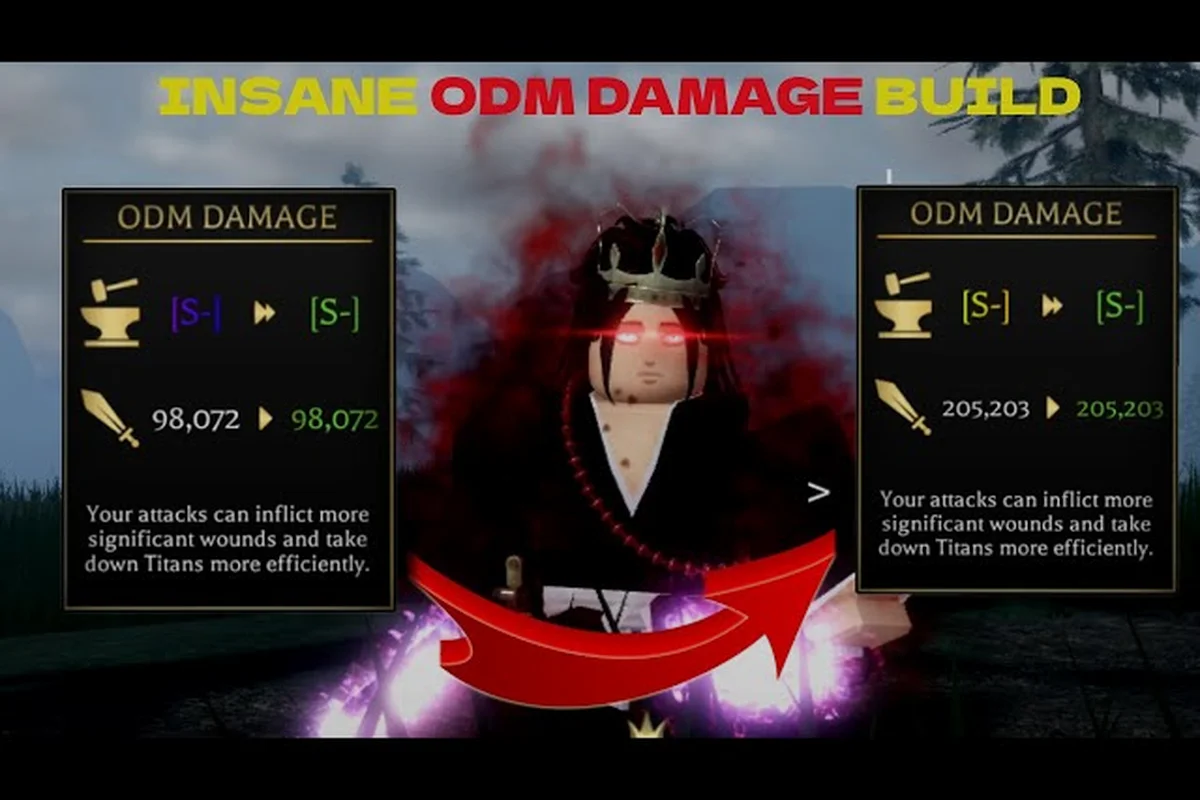
The Attack on Titan Revolution best build is not one fixed gear set; it is a connected series of family, perk, artifact, memory, vessel, and weapon choices. Matching those layers correctly matters because each one can strengthen or dilute the others, and this guide shows how to build effectively for ODM, Blade, Thunder Spear, and Shifter playstyles.
Build Guide: Build Around One Clear Goal
A strong Attack on Titan Revolution build begins with the playstyle you want, not with the strongest item you happen to find. Players who mix mobility, critical damage, defense, and raw strength without a purpose often end up with several average setups instead of one capable configuration.
The community-tested structure treats a build as five connected layers: a Shifter-focused setup, for example, should align its Family passive, Shifter skills, perk rolls, artifact effect, memory slots, and vessel upgrades around the same combat objective rather than combining unrelated bonuses. If the goal is fast Shifter damage, prioritize attributes and passive effects that strengthen the skill’s critical or raw-damage scaling; if the goal is survivability, shift the same layers toward defense, stamina, or sustain. This makes gear evaluation clearer, because every slot must explain how it supports the chosen playstyle before it can be considered part of the best Attack on Titan Revolution build. The official the game page on Roblox identifies the game and its build layers, but it does not create a universal gear recipe. Your final strength depends on how consistently those layers point in the same direction.
-
Family passive and skills establish the intended combat direction.
-
Perk rolls refine that direction through attributes and upgrades.
-
Artifact effects provide a complementary passive bonus.
-
Memory slots reinforce the attribute that the weapon or family needs most.
-
Vessel upgrades add another layer that must match the rest of the setup.
Start With a Weapon Identity
| Desired playstyle | Primary weapon identity | Main build focus | Best early investment |
|---|---|---|---|
| Fast scouting and repeated strikes | ODM Gear | Attack Speed, movement, critical damage | Blade upgrades, gas management, and mobility perks |
| Close-range critical combos | Blade | Critical Rate, Critical Damage, attack speed | Crit-compatible memories and fast blade upgrades |
| Heavy single-target pressure | Thunder Spear | Skill damage, weapon damage, strength | High-impact artifacts and concentrated memory rolls |
| Titan-form sustain and burst | Shifter | Shift duration, survivability, damage | Vessel synergy and balanced combat stats |
This table is a weapon decision matrix, not a promise that one stat always wins. A Blade setup may still include mobility perks, while Thunder Spear can benefit from stronger attack speed than its slower identity suggests. The important rule is that every chosen layer should support the same combat plan.
The Five-Layer Build Checklist
Start with a complete baseline rather than chasing isolated stat rolls: choose a core weapon for your preferred role, keep its family passive aligned with that role, and map which perk, artifact, memory, and vessel bonuses reinforce the same stat package. For example, an ODM build focused on rapid repositioning should prioritize attack speed, stamina recovery, and shift uptime, while a blade build benefits more from raw damage and decisive hits. This layered approach makes each upgrade easier to evaluate and reduces the risk of spending materials on bonuses that do not improve the final combat performance.
- Name the weapon's main job in one sentence.
- Confirm that the family passive contributes to that job.
- Check whether the perk set improves attack speed, damage, stamina, survival, or shift uptime.
- Verify that the artifact effect is complementary rather than redundant.
- Compare memory rolls with the attribute that limits the weapon most.
- Check the vessel bonus against the rest of the equipment.
- Test the setup in a controlled combat encounter before farming more materials.
This order prevents the most common mistake in an Attack on Titan Revolution build guide: upgrading every available system at once. Because each layer can be farmed or upgraded separately, concentrating resources usually produces a clearer power spike than spreading currency across unrelated bonuses.
ODM Build: Speed, Mobility, and Sustained Pressure
An Attack on Titan Revolution ODM build is strongest when it keeps the player attacking without running out of gas or stamina. The ODM identity favors rapid repositioning, frequent blade contact, and enough damage to exploit every opening. Its advantage is uptime: even when one attack does not feel enormous, repeated successful hits can produce excellent combat pressure.
Core ODM Priorities
| Priority | Why it matters | How to apply it |
|---|---|---|
| Attack Speed | Increases how quickly attacks can be used | Favor useful speed bonuses over flat defense once basic survival is secure |
| Movement | Helps maintain attacking angles and escape pressure | Avoid dedicating nearly every slot to damage |
| Critical Damage | Rewards precise, high-value strikes | Pair with critical rate where the gear allows |
| Stamina | Supports movement and repeated attacks | Keep upgrades balanced with offensive gear |
| Gas efficiency | Extends active combat time | Improve the ODM weapon line before unrelated late-game systems |
The best ODM setup is not defined by one massive damage number. It is defined by attack uptime: enough movement to reach a stable angle, enough stamina to stay there, and enough speed to use the blade before the opening closes. This makes the ODM particularly effective against multiple opponents when its duration advantages are fully utilized.
For additional crit-oriented options, the Attack on Titan Revolution Crit Build explains how to connect critical rate and critical damage without sacrificing too much survivability. Use that approach when your ODM family already provides reliable critical hits; otherwise, prioritize movement and weapon familiarity first.
Building the ODM in Practice
Start by improving the ODM weapon line, gas capacity, and blade damage because these investments compound directly with the family passive. Then add attack-speed and movement perks. Artifacts and memories should reinforce speed, stamina, or critical output, while the vessel slot should provide a broad benefit that does not contradict the rest of the equipment.
A practical ODM sequence looks like this: prioritize weapon-line upgrades, gas capacity, and blade damage first, since stronger gear improves both normal attacks and ODM pressure against high-HP Titan enemies; then layer in attack speed and movement perks to preserve combo uptime and repositioning during evasive encounters. For example, a blade-focused ODM loadout should favor damage and critical-output gains, while a mobility-heavy setup should keep attack speed and movement ahead of raw damage, because faster ODM cancels and repositioning often create more total damage opportunities than a larger one-off hit.
-
Equip the desired family and verify that its passive matches the ODM playstyle.
-
Upgrade gas and blades enough to support normal combat encounters.
-
Add attack-speed perks before filling every slot with raw damage.
-
Choose one artifact that improves combat efficiency, not merely collection value.
-
Use memories to cover the attack speed or movement deficits that remain.
-
Review the vessel bonus and replace it if it favors an unrelated playstyle.
The community gameplay guide from Robomajing similarly presents progression as a sequence: settle on a family, shape perks around its passive, and then select the weapon the setup is built to support. That approach prevents expensive gear from being wasted on an incompatible foundation.
Blade Build: Fast Crit Chains with Clean Execution
An Attack on Titan Revolution Blade build focuses on rapid close-range hits, critical strikes, and smooth attack chains. Its setup should make critical opportunities easier to create and preserve while still delivering enough speed to use them before an enemy reacts. Unlike the broader ODM category, a dedicated Blade setup focuses more directly on individual strike timing and critical consistency.
Blade Stat Plan
| Build layer | Preferred effect | Secondary need | Common mistake |
|---|---|---|---|
| Family | Critical opportunities or attack-speed support | Enough damage to finish a chain | Selecting a passive that conflicts with the blade timing |
| Perks | Critical Rate, Critical Damage, Attack Speed | Stamina or survivability | Ignoring basic defense before high-tier content |
| Artifact | Critical damage or attack-frequency synergy | A useful secondary stat | Choosing an inactive effect with little combat value |
| Memories | Critical Rate and Critical Damage | Attack Speed for chain consistency | Rolling only one critical attribute |
| Vessel | Broad damage, speed, or uptime support | Balanced secondary stats | Activating a bonus for an unused build family |
A strong Blade build does not need the highest possible critical rate on every item. Critical consistency is more valuable than extreme specialization because a blade sequence should still produce meaningful hits when a critical does not land. Pairing a moderate critical rate with good critical damage, attack speed, and stamina creates fewer frustrating gaps than a setup built around one brittle stat.
Make the Blade Chain Work
Blade players should benchmark their setup using actual attack cycles rather than a static stat menu. Watch how quickly the first hit lands, how much delay follows the second, and whether movement drains stamina before the chain reaches its final strike. If the weapon feels slow, increase attack speed or reduce unnecessary weight before assuming the artifact is the problem.
The family layer should create a reason to use Blade. If the passive improves critical damage, rapid attacks, or another part of the blade identity, it naturally multiplies the value of the rest of the setup. If it improves an unrelated stat, even excellent gear can feel disconnected from the weapon in your hands.
Use the Attack on Titan Revolution family skill guide to check how the family passive and skills contribute before replacing artifacts. This comparison keeps the build centered on an actual combat effect rather than an item name that may become outdated after a balance change.
Thunder Spear Build: Heavy Bursts Against One Target
An Attack on Titan Revolution Thunder Spear build trades constant movement for concentrated damage. It is designed to punish a target when the player can create a stable opening, making it a strong choice for serious boss attempts and focused encounters. The important distinction is that the weapon does not need to win through the same uptime model as a Blade or ODM setup.
Thunder Spear Distribution Guide
| Component | Best use | Why | What to avoid |
|---|---|---|---|
| Family | Skill-focused damage or heavy weapon support | Increases the value of deliberate charged attacks | A passive that only rewards constant critical hits |
| Perks | Weapon damage, skill damage, strength | Strengthens the weapon's main damage window | Excess speed investment without a reliable accuracy advantage |
| Artifact | Burst damage or skill amplification | Supports the spear's strongest feature | A farming-oriented effect with no combat contribution |
| Memories | Damage, strength, or relevant cooldown support | Reinforces the spear’s impact | Four memories that improve the same nonessential stat |
| Vessel | Damage with a usable secondary stat | Supports the full attack cycle | A bonus that only helps another weapon family |
The Attack on Titan Revolution best thunder spear build should keep burst timing intact. Movement and attack-speed bonuses can be valuable, but they should not distract from the spear's core strength if your goal is to land fewer, heavier attacks.
Positioning Matters More Than Passive Hunting
Before farming another memory, improve your ability to create and hold an attacking angle. A Thunder Spear player who can consistently land its heavy attacks benefits from stronger damage percentages, while a player who loses positioning rarely converts those percentages into actual damage. Movement, gas, and stamina remain relevant, but their purpose is to protect the opening rather than create a fast-attack build.
Build progression should follow three checks: first, test whether your current setup can land a Thunder Spear heavy attack from a reachable angle; second, compare the damage gain from your artifact and vessel bonuses with the contribution from the equipped family; third, verify that the build can transition into a clean finishing sequence without exhausting gas or stamina. This order matters because a stronger percentage is valuable only when the opening is secured, whereas a small percentage increase in a poor ODM-gas route can reduce total damage. Treat the three checks as a progression loop: diagnose the failed layer, adjust the relevant gear, then retest the same encounter rather than adding another memory immediately.
-
Connection: Can the player reach the target without wasting the first attack window?
-
Commitment: Does the equipped family increase the spear's damage or reward the intended attack?
-
Cleanup: After the heavy hit, can the player finish the target before safety pressure returns?
If one check fails, replace the responsible layer before adding more damage. For example, if the Thunder Spear cannot connect with a reachable heavy attack, improve ODM Gas movement and attack-angle selection rather than changing the artifact; if the artifact performs well but the equipped family does not increase spear damage, test another family instead. A strong artifact cannot repair poor positioning, and a vessel bonus cannot compensate for a family that discourages the weapon you actually use.
Shifter Build Guide: Survive the Shift Window
An Attack on Titan Revolution shifter build guide should prioritize survival, shift uptime, and damage during the transformed window. The Shifter identity is different from ordinary weapon builds because the player must preserve enough resources to enter the form, operate inside it, and exit without becoming an easy target. One massive damage bonus matters less if the character cannot remain active long enough to use it.
Shifter Priorities
| Priority | Build purpose | Best source of improvement |
|---|---|---|
| Shift duration | Preserves more useful transformed time | Family support, vessel effects, or compatible memories |
| Damage while shifted | Converts survival time into meaningful pressure | Damage perks, artifacts, and memories |
| Stamina and mobility | Protects the shift window and movement | Balanced attribute rolls and weapon upgrades |
| Survivability | Reduces interruption risk | Defense values without sacrificing every offensive slot |
| Recovery | Supports repeated encounters | Upgrades that improve the broader build rather than one isolated skill |
Community showcases have reported Divine perks, Vessel access, and Beast Titan-related unlock details, but these remain community-tested rather than officially confirmed by patch notes. Treat those results as a planning reference rather than a guaranteed requirement. The same caution applies to reported percentages such as the community-cited Yeager passive near 0.1%, legendary clan near 0.5%, and Armored Serum near 0.03%; actual results can vary with the current version and account state.
Timing the Shifter Form
The Shifter should enter combat when its passive and stats can produce a meaningful advantage, not merely whenever the transformation becomes available. Compare the transformed damage gain with the time required to reach a target. If movement or setup takes too long, even a high-duration build can lose its window before the best damage arrives.
A reliable process is to test the form against ordinary targets first, then observe how it performs under pressure. Record three details: how quickly the transformation activates, how long the form remains effective, and whether the player exits voluntarily or is forced out by survival pressure. That creates a much more useful test than simply checking whether the form feels powerful for several seconds.
For a later-stage version of this approach, compare the Attack on Titan Revolution Late Game Build with your current gear. Its progression advice can help identify which upgrades should come first, while the Shifter-specific priorities remain focused on uptime and transformed-state efficiency.
How to Improve Any Attack on Titan Revolution Best Build
Even a well-designed setup can stagnate when its weakest layer receives all the attention. Improvement should follow a diagnostic process that compares the current equipment with the intended combat result. This applies whether you are refining a Blade setup, repairing a Thunder Spear build, or correcting an ODM configuration that no longer feels responsive.
Diagnose the Limitation
| Symptom | Likely weak layer | Best correction |
|---|---|---|
| Attacks feel slow | Weapon speed, perks, or stamina | Improve attack speed and verify that stamina is not the real cap |
| Damage disappears during pressure | Weapon damage, family, or positioning | Improve the weapon line and test a stable attack angle |
| Crits are inconsistent | Critical rate, critical damage, or attack speed | Balance critical rate with damage and chain speed |
| ODM runs out of gas | Gas upgrades or movement efficiency | Upgrade gas and avoid excessive speed or mobility stacking |
| Shifter form ends too soon | Duration support or vessel setup | Improve duration sources and test the entire shift cycle |
| Build feels active but weak | Artifact or family mismatch | Test each passive separately and remove redundant bonuses |
Start with the symptom rather than the item rarity. Rare gear can still be inefficient if its bonus does not address the limitation preventing the build from functioning. Measure combat behavior first, then change one layer and compare the result under similar conditions.
Upgrade in a Controlled Order
Use this sequence for the most reliable investment cycle: establish the build’s intended combat role first, then improve only the components that directly affect its damage, handling, and survivability. For example, a Thunder Spear build should prioritize the weapon’s relevant attributes and perk synergy, while a Blade or ODM build should compare mobility, stamina pressure, and raw damage before committing points. This order prevents early upgrades from spreading resources across mismatched systems and keeps the final setup flexible enough for changing encounters.
-
Confirm identity: Decide whether the weapon remains the main combat style.
-
Repair basics: Bring the weapon, gas, blade, and stamina systems to an appropriate level.
-
Tune the family: Verify that its passive and skills directly improve the selected style.
-
Fix attributes: Add only the perks and memories needed to solve the active limitation.
-
Select the artifact: Favor a useful combat effect over a decorative or inactive bonus.
-
Review the vessel: Compare its bonus with the final build before committing resources.
-
Validate through play: Test the same enemy, route, or encounter before and after each major change.
The Attack on Titan Revolution perk slot reference is useful for checking whether a slot is available for the attribute that is actually holding the build back. This prevents the common mistake of placing a high-value perk into a slot where it contributes almost nothing to the chosen weapon.
When to Change Families or Weapons
Change direction when several connected checks fail. For example, a Thunder Spear may deserve a rebuild if the family discourages heavy attacks, the artifact rewards a different playstyle, and the vessel contributes almost no useful value. Changing one random item rarely fixes that mismatch; replacing the supporting layers usually produces a better result.
A practical evaluation uses three questions: first, determine whether the family’s passive bonuses actually increase damage, reach, or attack speed for the chosen weapon; second, inspect whether the artifact, Memory effects, and Shifter skill bonuses amplify the same combat behavior instead of competing for limited gear slots; third, compare the setup before and after its most relevant upgrade, such as weapon level, talent rank, or ODM Gear enhancement. For example, a Thunder Spear build aimed at close-range heavy attacks should gain more from attack power, reach, and stagger effects than from bonuses that merely improve movement speed or resource regeneration.
-
Does the family make the intended weapon more effective?
-
Do the perks, artifact, memories, and vessel reinforce the same combat goal?
-
Does the setup perform better after the relevant upgrade than it did before?
If the answers are no, no, and no, the problem is the build's direction rather than one unlucky item. The Attack on Titan Revolution best build is the one whose layers explain each other and whose performance can be measured clearly in combat.
Best Build: Final Optimization Checklist
The strongest Attack on Titan Revolution build guide does not depend on a universal list of item names. It teaches a repeatable decision process: choose an identity, connect every passive to that identity, improve the weapon's basic function, and use upgrades in the order that produces the largest practical gain.
Before calling a setup complete, verify these points with a short combat test: use a comparable enemy or encounter, track dodge uptime, attack speed, critical-hit consistency, and survival pressure, then confirm that the weapon’s role still matches the chosen family. For example, a Blade build should preserve critical timing and enough ODM mobility, while a Shifter build should validate its active transformation window against sustained enemy pressure rather than judging it only by displayed damage.
- The primary weapon has a clear combat job.
- The family passive strengthens that weapon or its intended timing.
- The perk set addresses a real limitation.
- The artifact offers meaningful active or passive value.
- The memories cover offensive and survivability needs.
- The vessel bonus agrees with the rest of the build.
- The setup has been tested against comparable enemies or encounters.
This build guide covers the main routes used by Attack on Titan Revolution players: the mobility-focused ODM build, the critical Blade build, the burst-focused Thunder Spear build, and the uptime-centered Shifter build. The correct choice is not always the one with the highest displayed damage; it is the setup whose family, equipment, and timing work together when the fight becomes difficult.
Frequently Asked Questions
What is the best build in Attack on Titan Revolution?
There is no single best setup for every account and playstyle. A strong overall build begins with a compatible family, improves the chosen weapon and support systems, then uses perks, artifacts, memories, and the vessel to reinforce one goal. Blade favors rapid critical hits, ODM favors mobility and uptime, and Thunder Spear favors concentrated burst damage.
Should I use Blade or ODM Gear for beginners?
Blade is approachable when you can time rapid close-range attacks, while ODM Gear is more forgiving when movement and repositioning are your strengths. Compare the family passive, stamina requirements, and attack speed before committing. The better option is the weapon that lets you land attacks consistently rather than the one with the largest displayed damage.
How do I improve a Thunder Spear build?
Improve the weapon line first, then use a family and perks that reward deliberate, high-impact attacks. Artifacts and memories should support weapon or skill damage, while the vessel needs to contribute something useful to the same setup. Test positioning because stronger damage cannot replace a reliable opening against a moving target.
Is luck useful for a damage-focused Shifter build?
Luck is primarily a farming and acquisition stat rather than a direct damage stat. It can help you find better equipment, but transformed-state performance depends more on duration, damage, movement, and survival. Avoid treating a rare lucky roll as automatically superior to a balanced roll that supports the stats your Shifter needs during combat.
Can a strong build work across multiple weapons?
Some layers can remain flexible, especially basic weapon upgrades, stamina, and certain artifacts, but the family and major bonuses should still match the weapon in use. A setup that works with Blade may feel weak with Thunder Spear because its timing, movement, and passive benefits are different. Test each weapon before assuming the same configuration is equally effective.